Signage and bicycle safety rules
To help you tackle group outings, here are a few cycling safety rules and signs we recommend you know by heart for your next road outing.
MULTI-RIDER
When riding in a group, there are several rules to be observed.
#1 Compliance with traffic regulations.
Including its bans on cyclists:
– use pedestrian walkways or access roads that are off-limits to cyclists,
– drive in the opposite direction, unless authorized by signs or in case of extreme necessity,
– drive on the sidewalk, except where necessary or where signage permits,
– use headphones (subject to fine),
– driving with a defective brake system.
#2 Drive as close as possible to the right side of the road.
#3 Signal all your intentions.
You’ll find all the details below in this section.
#4 Respect the formation of the pack
You’re allowed to ride with a maximum of 2 abreast, as anyone riding 3 abreast is a road hazard (except when the road is closed).
Choose to ride in simple formation. Complex formations are nice on the Tour de France when the roads are closed, but they don’t mix very well with cars.
#5 Any electronic device displaying information useful for riding must be mounted on a fixed support on the handlebars.
#6 Take out insurance to protect you in the event of a fall.
ANNOUNCE A STOP
There are two main signs that signal a stop and therefore ask people behind you to slow down.
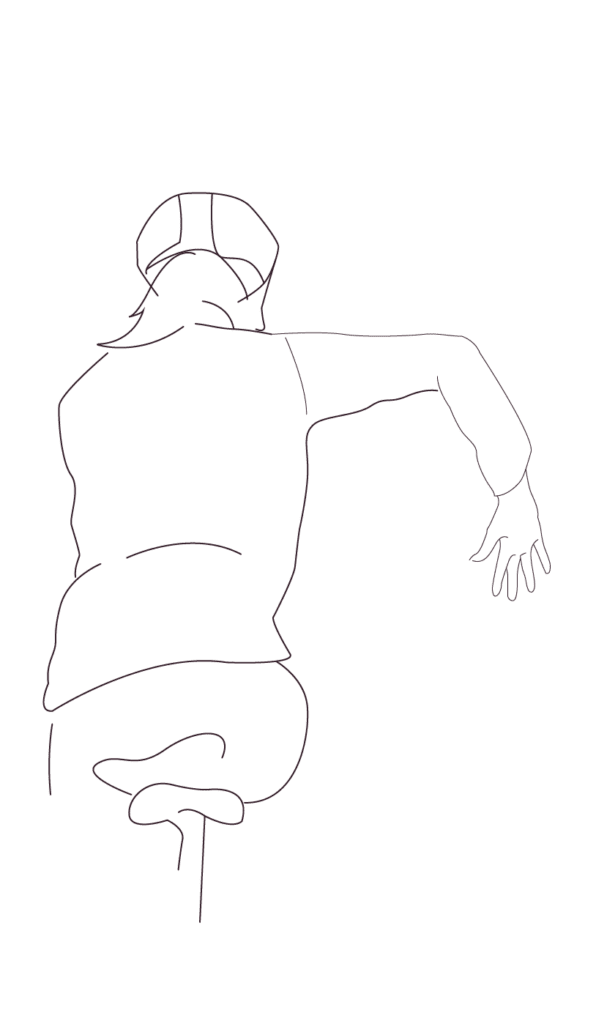
The first is to put your hand back, palm towards the other cyclists with a backward movement. This gesture is particularly useful in dense pelotons or when people are concentrating on a speed peak (the “nose in the handlebars” as we say) as it comes directly into their field of vision.
The second, very useful in the case of a very “long” peloton, is to raise your hand in the air, palm facing forward. This sign will be visible from a distance, and can warn those at the back of the pack that they’re slowing down.
OBSTACLE ON RIGHT
Announcing obstacles on the ground is essential to avoid falls in a peloton. The people behind you don’t have the same visibility, so they can’t anticipate what’s going to pass under their wheels as well as you can.
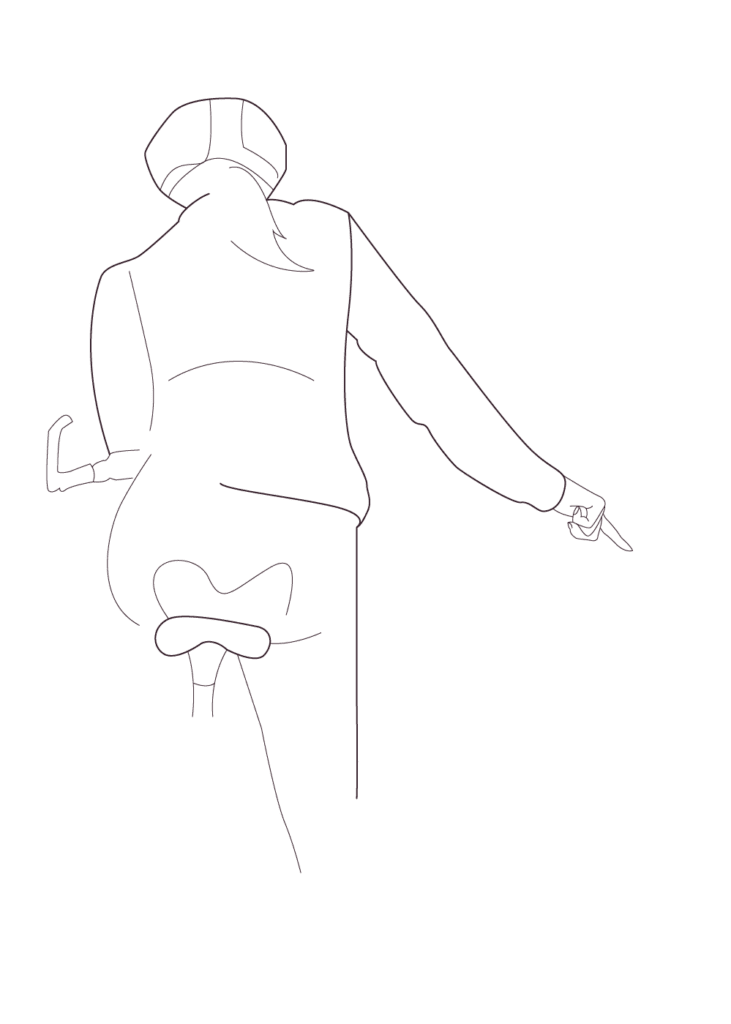
What do we announce: sidewalks, holes, pavement changes, pebbles, shards of glass, excess earth, slippery areas, water stagnation…
How it’s announced: point your finger at the obstacle and gesture from left to right.
SLOW DOWN
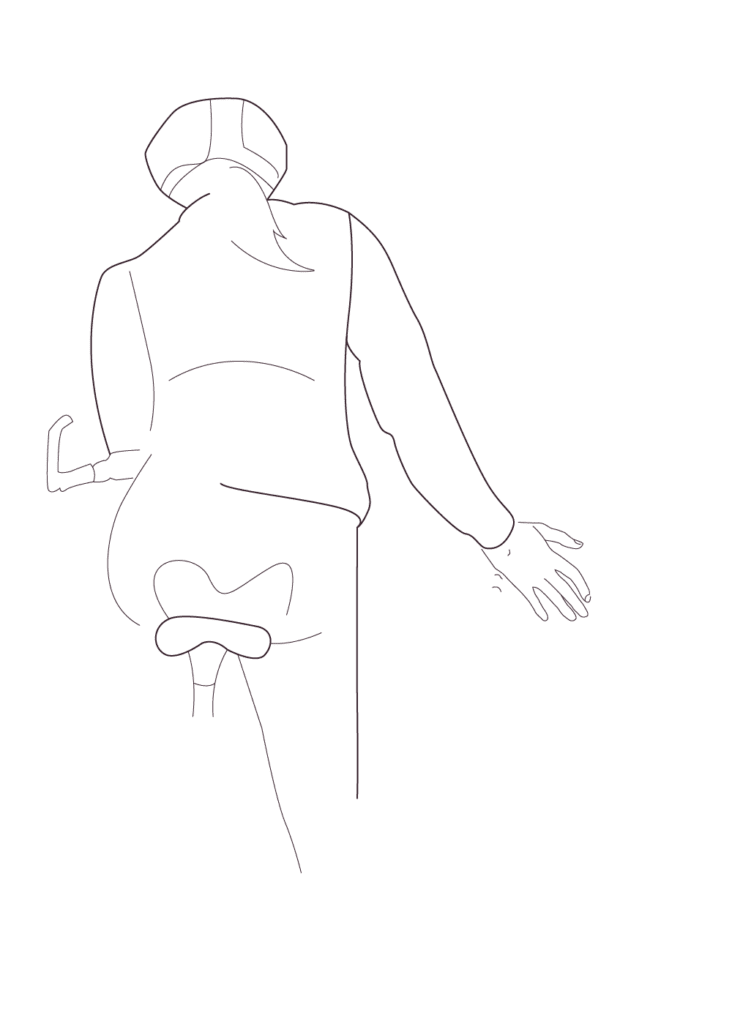
We love speeding, and sometimes announcing a slowdown is more complicated than expected. It’s important to tell others to slow down to avoid collisions between cyclists.
There’s a simple way to do this: take your hand, palm down, and make repeated up-and-down movements.
SIGNAL A RAILROAD TRACK
The rails can be very dangerous, firstly because we can slip on them, but also because of the trains (and yes!).
Announcing it is simple: you make the Victory sign, the famous V with your fingers, and put your hand behind your back.
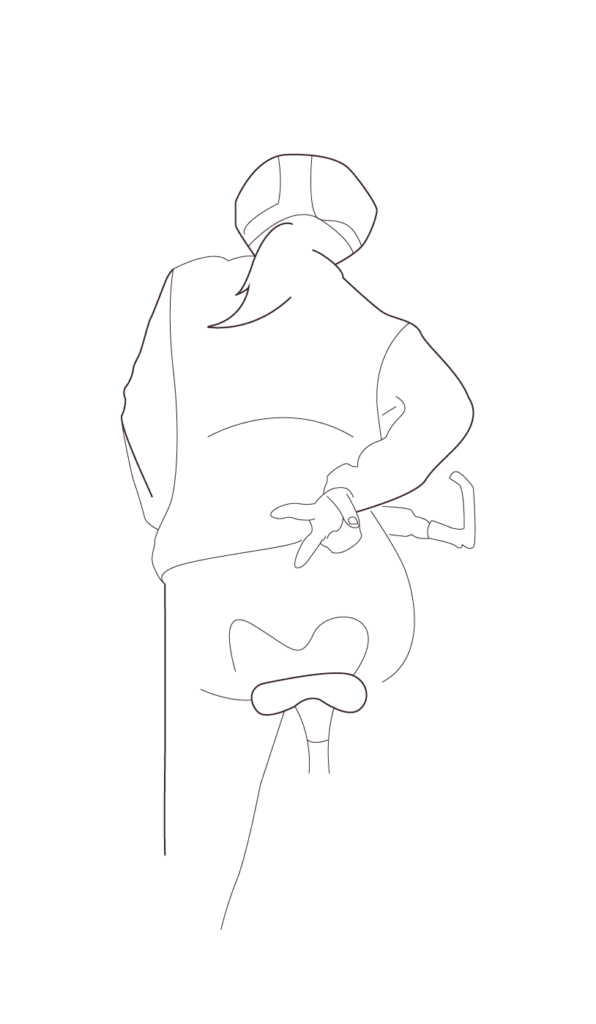
ANNOUNCE A TURN
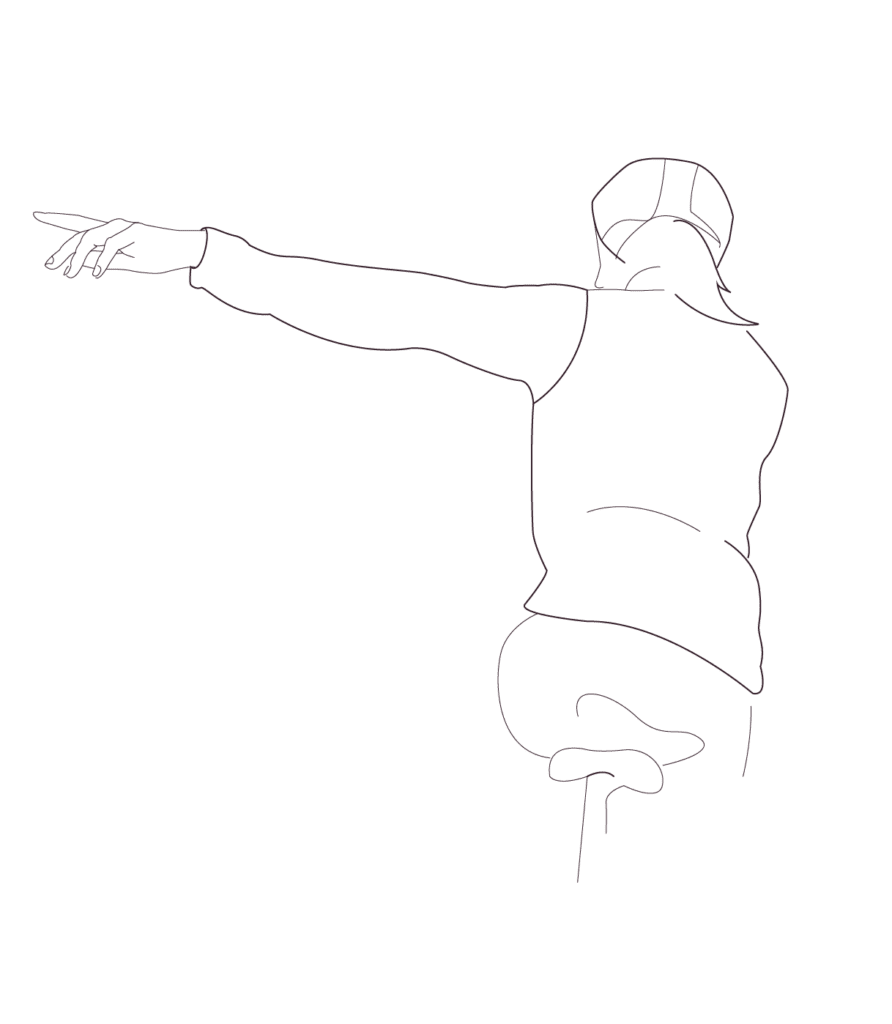
Your GPS (or your super knowledge of the roads) lets you know that it’s time to turn. Now it’s time to tell the rest of the pack so they can get ready.
Announce a turn by stretching out your arm on the side towards which you’re going to turn. It’s also a way of letting cars know that you’re going to turn, so you don’t get run over.
MANAGE YOUR EQUIPMENT
ADJUSTING YOUR HEADPHONES
Head injuries account for around 60% of cyclist fatalities. The head is the part of the body most exposed to serious injury. The helmet absorbs the impact of an accident, and the force of the impact is distributed over its surface rather than over the head.
How to position it correctly?
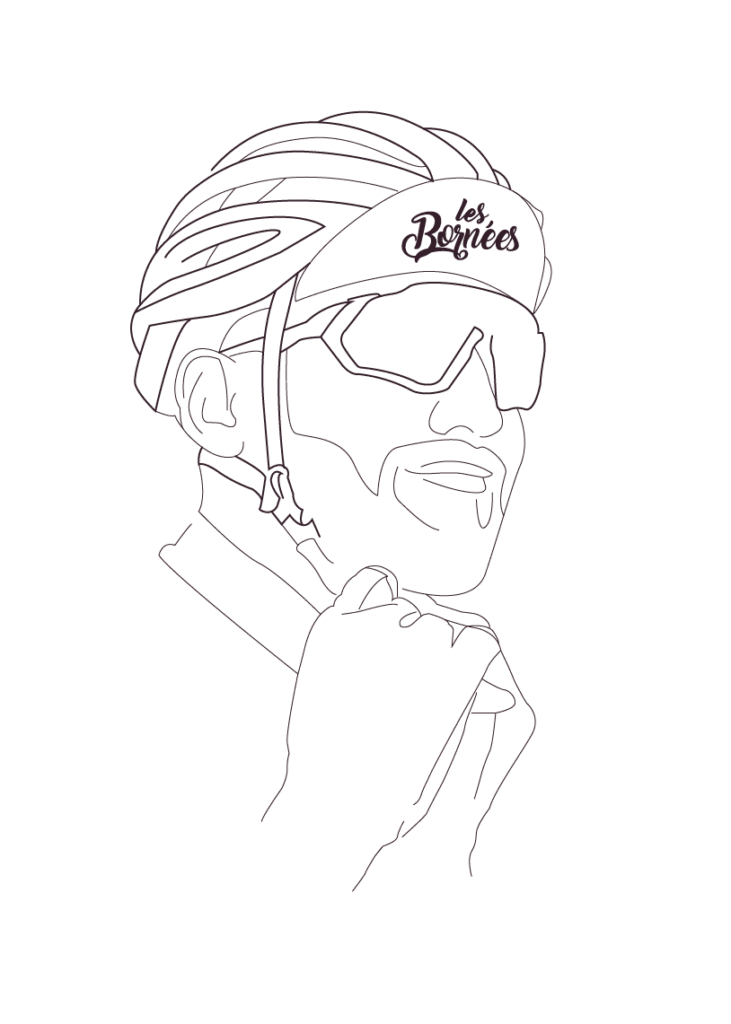
#1 Make sure the weight, pads and adjustment straps fit properly.
#2 Front and rear straps meet under the ear.
#3 Chinstrap not too tight.
#4 The helmet fits snugly, so it doesn’t flop around or fall on your forehead or neck.

AND GLASSES?
They’re not just sunglasses! You need to choose glasses specially designed for cycling, to protect you not only from the sun, but also from insects and other small projections that could injure you.
Selection criteria :
#1 Protection, glasses should be wraparound, shaped to fit the face and have solid lenses.
#2 Lens color must be adapted to the weather (photochromic lenses are preferable).
#3 Glasses must fit snugly, must not slip, must not hurt the ears, and must not be crooked.
MANAGING A FALL
The first step when a fall occurs is to make the area and the injured person safe. This potentially involves several actions:
– Remove equipment from the road,
– Position a person upstream to announce a slowdown to cars,
– Position people close to the victims to secure them,
– Call for help.
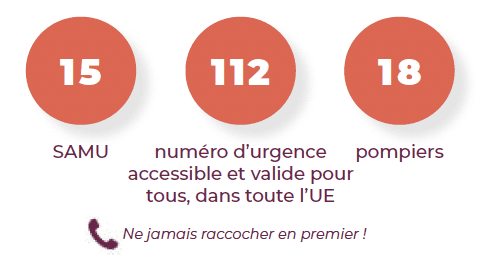
3 numbers to know
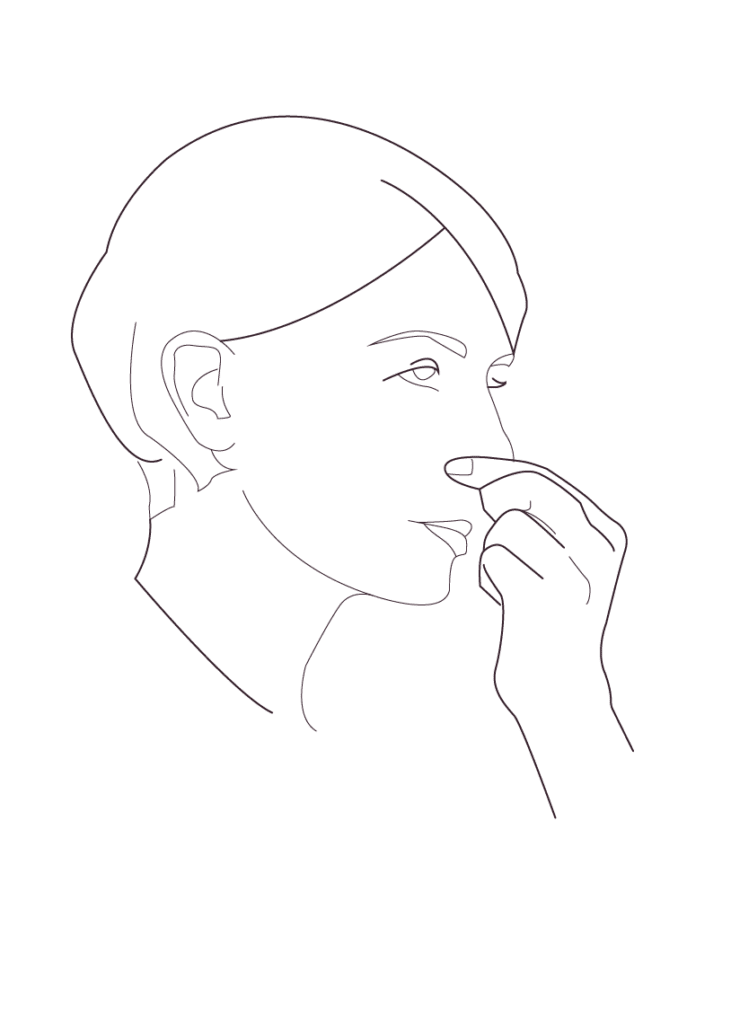
NOSEBLEED
A fall has occurred and someone is bleeding from the nose. Here’s what to do while waiting for the fire department.
How to position it correctly?
#1 Sit the victim down (do not lay him/her down)
#2 Tilt head forward
#3 Squeeze nostrils between forefinger and thumb for 10 minutes. You can do this with a handkerchief to avoid spilling too much blood.
CYCLIST ON THE GROUND
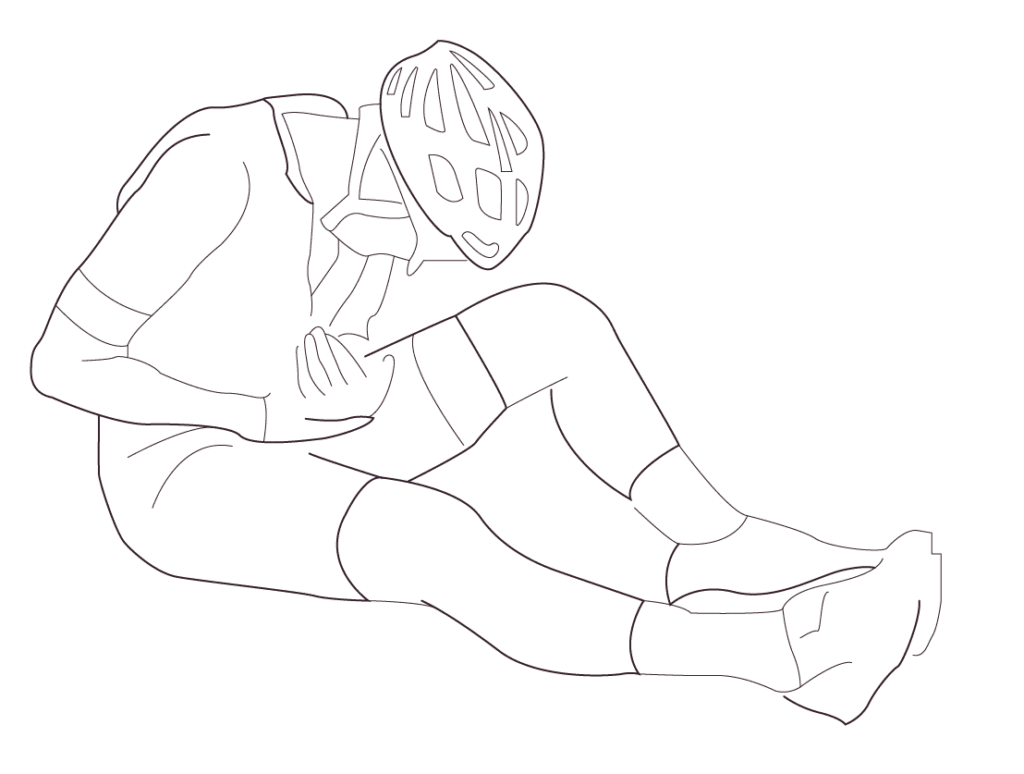
Signs of trauma (dislocation, fracture, sprain)
– Abnormal limb posture,
– Sharp pain in the area in question,
– Swelling and/or deformation of the area,
– Difficulty or inability to move the limb.
Back, neck or head pain
#1 Ask him to lie still.
#2 Alert emergency services.
#3 Immobilize the head in its current position
with both hands.
#4 Monitor and talk to the victim regularly.
Arm, forearm, hand, collarbone pain
#1 Sit him down and ask him to hold his forearm/limb.
touched with the healthy arm. You can use the cycling jersey to help support the arm.
#2 Alert emergency services.
In all situations, cover the cyclist, as a person in shock on the ground will cool down.
What to do in the event of a wound
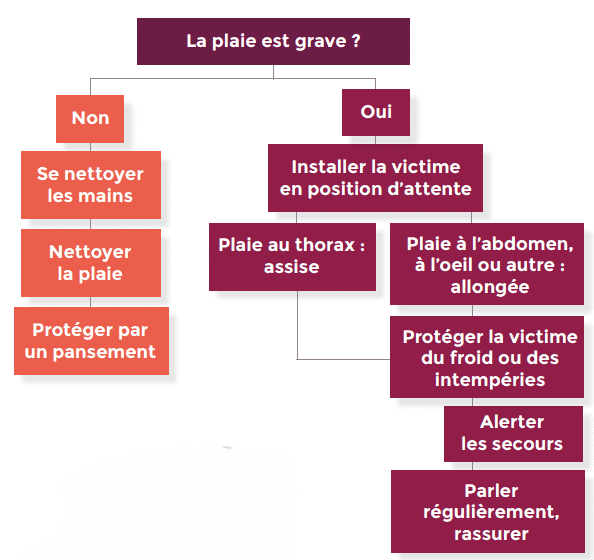
For an abdominal wound, keep the legs flexed to relax the abdominal belt.
In the case of a hemorrhagic wound, the procedure to follow is either direct manual compression with a cloth, or tourniqueting with an inner tube. The tourniquet should be applied as close as possible to the wound, and the time of application should be noted.
The person loses consciousness!
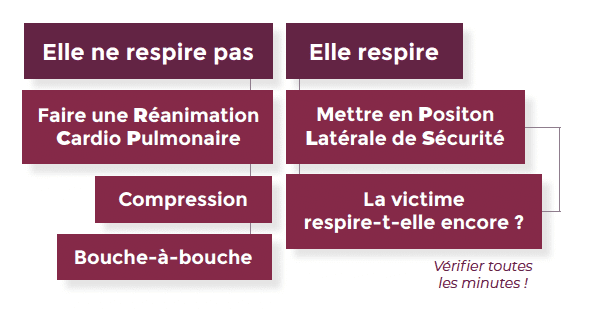
For an unconscious person who is not breathing, do not perform insufflations unless you are professionally certified. Perform chest compressions and do not stop until help arrives or the victim’s breathing resumes.
If the person is breathing, remember to cover him or her, as an unconscious person will quickly become cold.
